ThreadTone
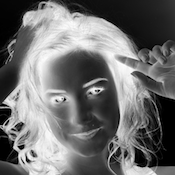
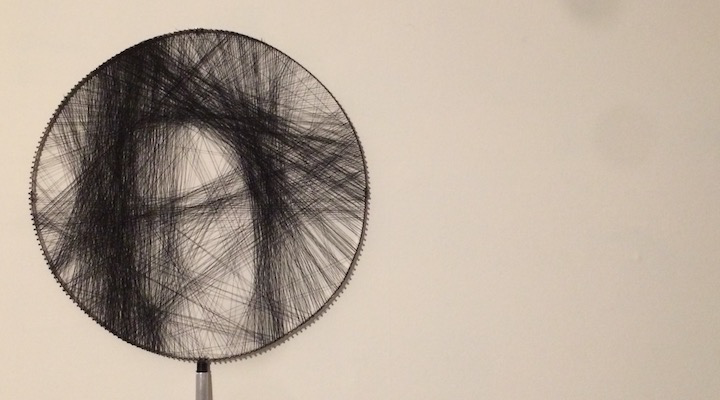
Not too long ago I came across a piece of art made by Petros Vrellis. A piece of art that makes the engineer in me scream: automation. As can be seen below Petros uses a circular loom and a lot of patience to develop portraits from thread. Below I’ll quickly go through the steps of automating the process but of course all the credits go to the artist behind this amazing idea! The final result is a halftone representation of an image using nothing but thread.

The main idea is comprised of three steps. First a little image pre-processing is done to various input images for threading. Second is some processing done in python to determine where one should place the successive threads as to obtain the best image representation. Third, I can put my laserless lasercutter to work to do the heavy lifting.
Image pre-processing
To allow image processing on a pixel level we use openCV. Let’s get started and do some initial processing of the image. The snippet below shows how one can load, crop and resize an image.
import cv2
import numpy as np

# Invert grayscale image
def invertImage(image):
    return (255-image)

# Apply circular mask to image
def maskImage(image, radius):
    y, x = np.ogrid[-radius:radius + 1, -radius:radius + 1]
    mask = x**2 + y**2 > radius**2
    image[mask] = 0

    return image

# Load image
image = cv2.imread(imgPath)

# Crop image
height, width = image.shape[0:2]
minEdge= min(height, width)
topEdge = int((height - minEdge)/2)
leftEdge = int((width - minEdge)/2)
imgCropped = image[topEdge:topEdge+minEdge, leftEdge:leftEdge+minEdge]

# Convert to grayscale
imgGray = cv2.cvtColor(imgCropped, cv2.COLOR_BGR2GRAY)

# Resize image
imgSized = cv2.resize(imgGray, (2*imgRadius + 1, 2*imgRadius + 1))

# Invert image
imgInverted = invertImage(imgSized)

# Mask image
imgMasked = maskImage(imgInverted, imgRadius)
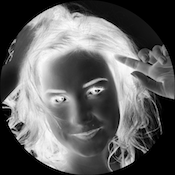
Once the image is of the correct size it is converted to a gray-scale image and inverted. In this form the image can be represented as an array where the originally darkest places have the highest value. Finally the image is masked with a circular mask (all values outside the circle are set to zero).


Threading algorithm
Deciding where one needs to pass the thread as to obtain a representation of the original image is the main focus of the algorithm. For this the assumption is made that a circular loom is used with an evenly spaced amount of pins.
As seen in the clip above the algorithm starts at a random pin. It checks all possible options for the one that would best fit the image. It now draws the optimal line, accounts for the “darkness” added by this line and starts again. The functions below generate the pin coordinates of the loom and a mask representing a certain line.
# Compute coordinates of loom pins
def pinCoords(radius, nPins=200, offset=0, x0=None, y0=None):
    alpha = np.linspace(0 + offset, 2*np.pi + offset, nPins + 1)

    if (x0 == None) or (y0 == None):
        x0 = radius + 1
        y0 = radius + 1

    coords = []
    for angle in alpha[0:-1]:
        x = int(x0 + radius*np.cos(angle))
        y = int(y0 + radius*np.sin(angle))

        coords.append((x, y))
    return coords

# Compute a line mask
def linePixels(pin0, pin1):
    length = int(np.hypot(pin1[0] - pin0[0], pin1[1] - pin0[1]))

    x = np.linspace(pin0[0], pin1[0], length)
    y = np.linspace(pin0[1], pin1[1], length)

    return (x.astype(np.int)-1, y.astype(np.int)-1)
Using the functions above the algorithm iteratively adds lines to the image until either the maximum number of lines is reached or the stopping criteria is reached. The fitness function is taken to be the specific line integral over the image. Lines that cover a lot of originally dark areas will therefore achieve a high fitness.
# Define pin coordinates
coords = pinCoords(imgRadius, nPins)
height, width = imgMasked.shape[0:2]

# Initialize variables
i = 0
lines = []
previousPins = []
oldPin = initPin
lineMask = np.zeros((height, width))

# Loop over lines until stopping criteria is reached
for line in range(nLines):
    i += 1
    bestLine = 0
    oldCoord = coords[oldPin]

    # Loop over possible lines
    for index in range(1, nPins):
        pin = (oldPin + index) % nPins

        coord = coords[pin]
        xLine, yLine = linePixels(oldCoord, coord)

        # Fitness function
        lineSum = np.sum(imgMasked[yLine, xLine])

        if (lineSum > bestLine) and not(pin in previousPins):
            bestLine = lineSum
            bestPin = pin

    # Update previous pins
    if len(previousPins) >= minLoop:
        previousPins.pop(0)
    previousPins.append(bestPin)

    # Subtract new line from image
    lineMask = lineMask * 0
    cv2.line(lineMask, oldCoord, coords[bestPin], lineWeight, lineWidth)
    imgMasked = np.subtract(imgMasked, lineMask)

    # Save line to results
    lines.append((oldPin, bestPin))

    # Break if no lines possible
    if bestPin == oldPin:
        break

    # Prepare for next loop
    oldPin = bestPin
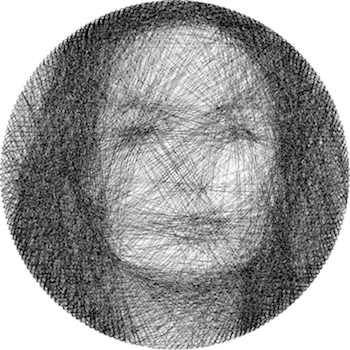
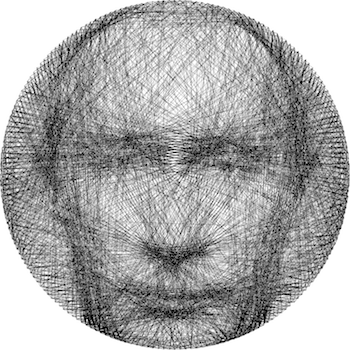
Once the algorithm no longer finds any possible lines the loop is broken and the result can be further processed. Below one can find two examples of the algorithms result. Move over the image in question to see the original image.
NC threading
Always fascinated by the ease at which a lasercutter can produce quality parts I set out to build my own. It turned out I could never get myself to make the last investment and actually buy the lasertube/optics. This means I have a huge part of my small student room filled with this big Cartesian plotter. Coming across Petros’s project it finally got a purpose.
Parsing the resulting line coordinates to G-code allows for some NC threading. A pen was used to develop a small guide for the thread. Below one can find the initial result of about 900 lines completed. At this point the thread broke and I called it a day. I will update the post with some images of the full result once I have some time to retry.
The full code is posted to GitHub and with some explanation on the tuning parameters. Any remarks or advise is most welcome and feel free to contact me with any questions.